2 Simple Ways To Use WordPress With GoDaddy Hosting

When you buy something through one of the links on our site, we may earn an affiliate commission.
Setting up WordPress has always seemed like a complicated task to beginners.
Most tutorials take users through tons of backend files and custom codes that deter them from building their WordPress site altogether.
But what if we told you that the entire process is as easy as creating an account on Facebook?
Keep reading to learn how to use WordPress with GoDaddy with two simple methods.
Contents
Buying A Hosting Plan And Domain
Before using WordPress, you need to purchase a domain and hosting plan for your website (and to make the best decision, check out our list of the best GoDaddy alternatives). Since most people get confused with the two terminologies, here's a more realistic explanation from WPBeginner:
If your website was a house, then your domain name would be its address.
GoDaddy offers a bunch of great hosting packages — whether you're creating a small portfolio or a giant e-commerce site — most of which include a free domain name.
Here's a step-by-step guide on how to purchase them from GoDaddy's website:
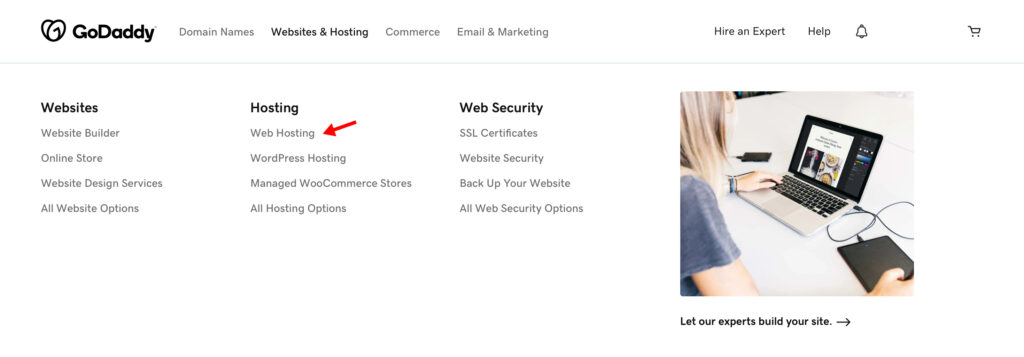
1. Open GoDaddy.com and sign up/sign in to your account.
2. Go to the shop page and look for 'Basic Web Hosting' (not WordPress, VPS, Plus plans).
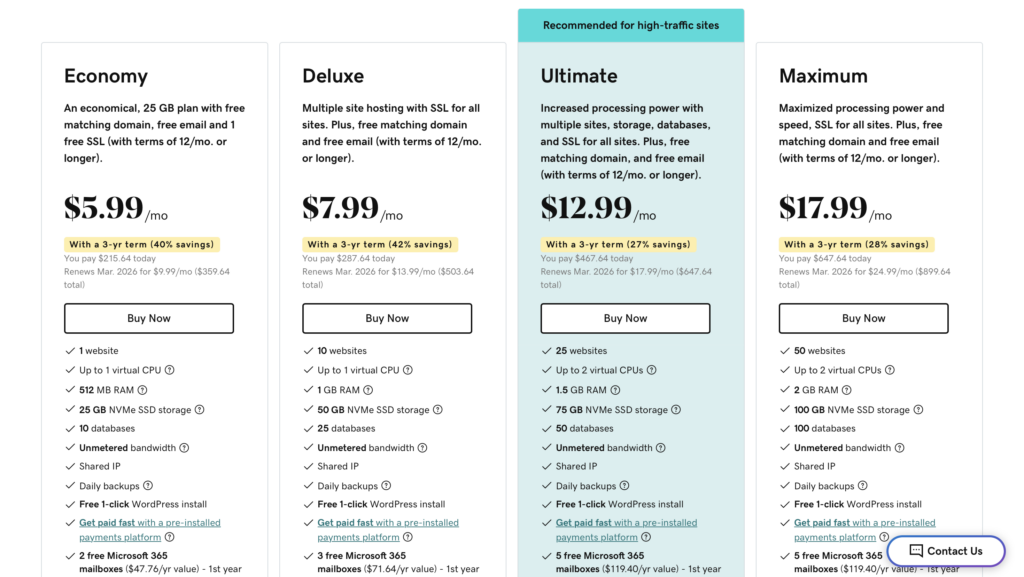
3. Compare the packages and click 'Buy Now' on whichever one suits you best. Here's a brief comparison of all the plans:
- Economy: Allows one website with 25 GB storage. Best for personal blogs, creative portfolios, and small business websites.
- Deluxe: Offers up to 10 websites with enhanced 50 GB storage. Optimal for medium-sized businesses, professional artists/photographers, and small e-commerce stores.
- Ultimate: Provides increased performance and up to 25 websites. Ideal for large-scale businesses, high-traffic niche sites, and global service providers.
- Maximum: Features maximum performance, storage, and websites. Perfect for multi-national corporations, international e-commerce stores and marketplaces, and online forums.
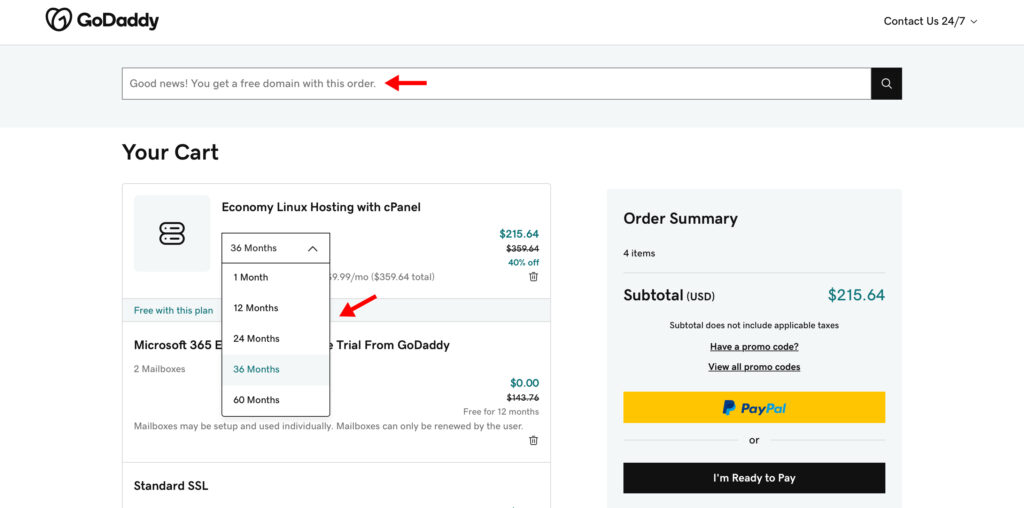
4. Select the duration of your plan from 1 month to 36 months (discounts go higher as you extend your subscription length).
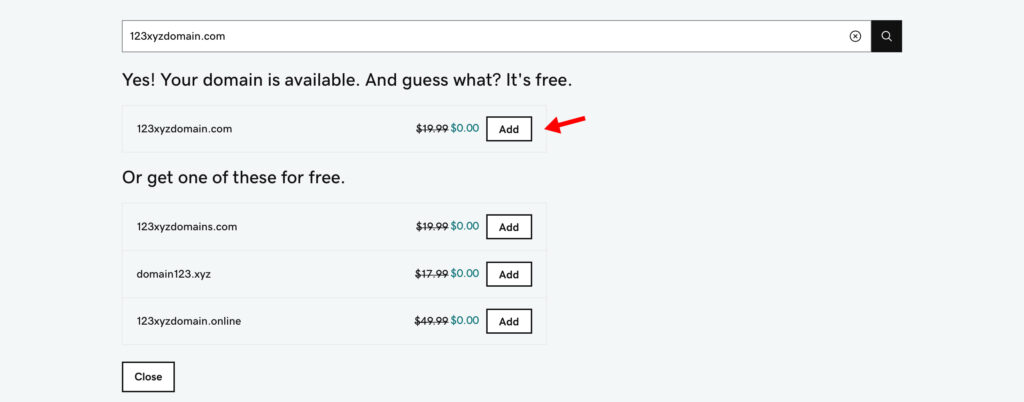
5. Enter your chosen .com domain name in the search bar and click on 'Add' if it's available.
(Note: Free domain is only available if you purchase a 12-month plan or higher)
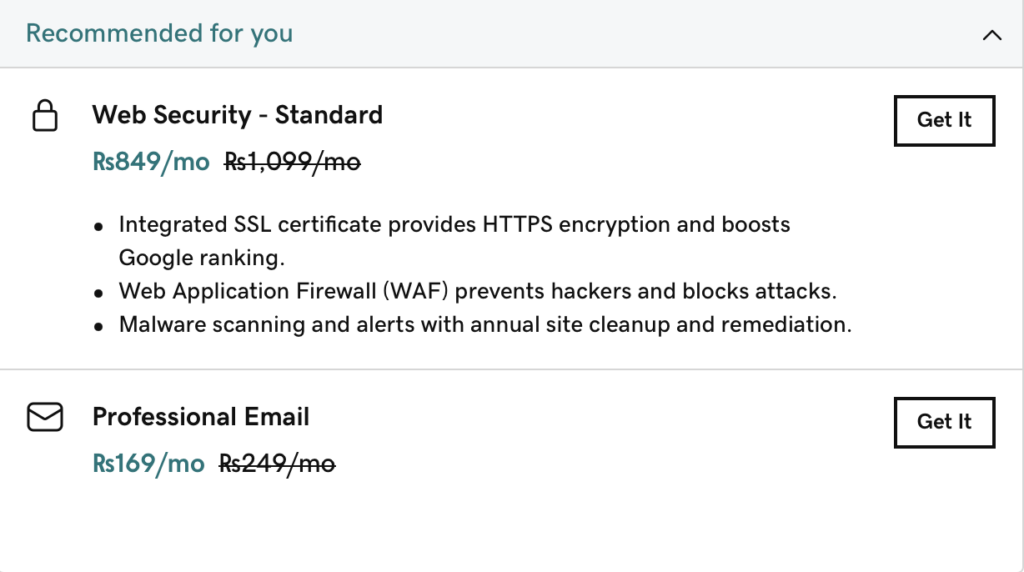
6. Add extras like Web Security or Professional Email to your package if they're not already included in your bundle. These offer the following benefits:
- Web Security: Protects your website from hackers and integrates SSL to secure your user's data like credit cards, passwords, etc.
- Professional email: Gives you a special email with your domain name at the end, i.e., [email protected], so you can contact clients more professionally.
7. Review your order and apply any promo codes before proceeding to payment.
How To Install WordPress From GoDaddy
Once you've purchased a hosting package and domain for your website, it's time to start installing WordPress.
Fortunately, GoDaddy adds a free one-click WordPress installer on a 12-month package (or higher) that makes the whole process easier.
Here's how to use it to install WordPress from GoDaddy:

1. Log in to your GoDaddy account.
2. Scroll down to the 'Web Hosting' section and click on 'Set up' next to your hosting package.
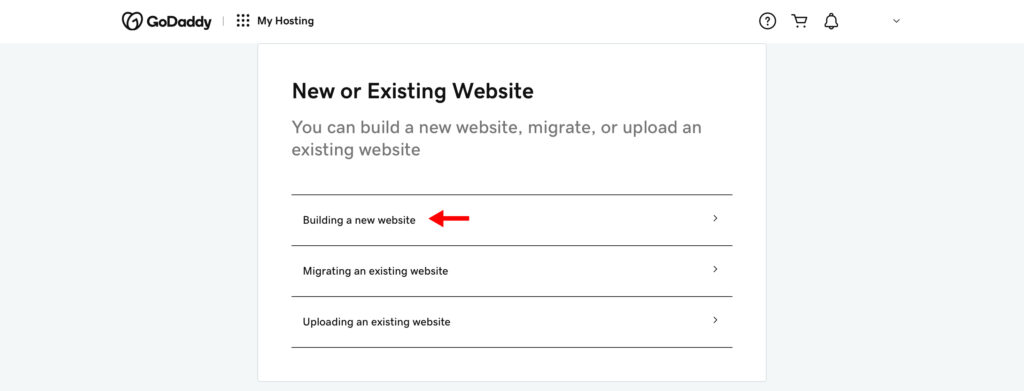
3. Click on the 'Building a new website' option.

4. Enter the domain name on which you want to install WordPress and click 'Continue' or select one from GoDaddy by clicking on the 'Use a domain in my account' button.
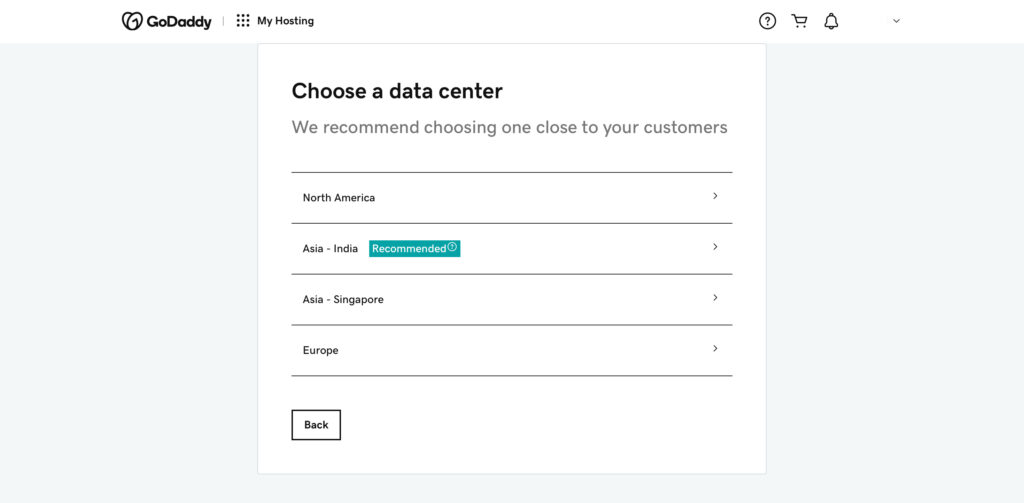
5. Select a data center that's closest to your target audience.
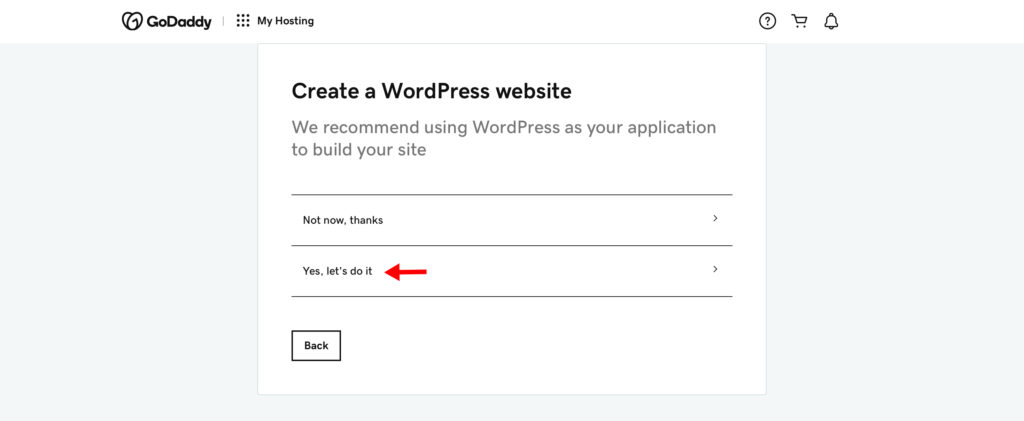
6. You will be asked to create a WordPress website. Click on 'Yes, let's do it' to continue.
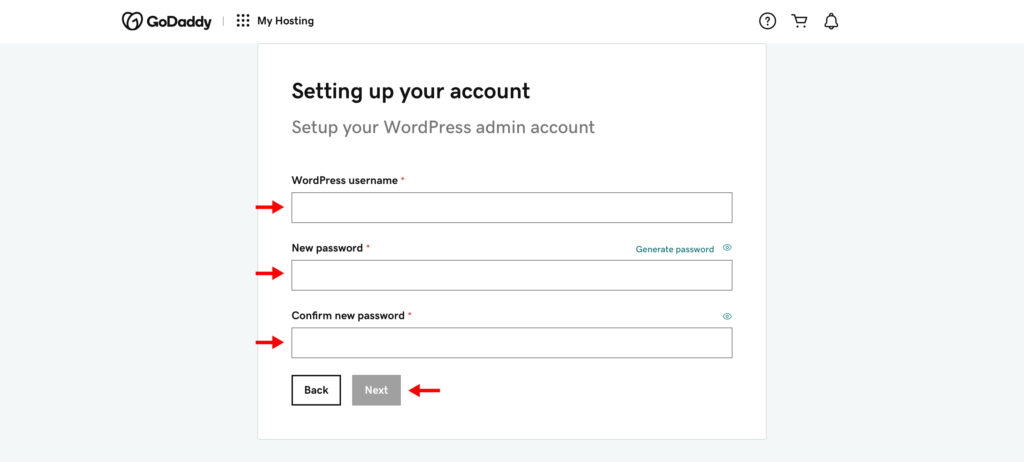
7. Create a username and password for your WordPress website. Re-enter your password and hit 'Next.'
8. A progress bar will appear to display the installation status. Once it's complete, an 'Onboarding Successful' message will appear. Click on 'Go to Dashboard.'
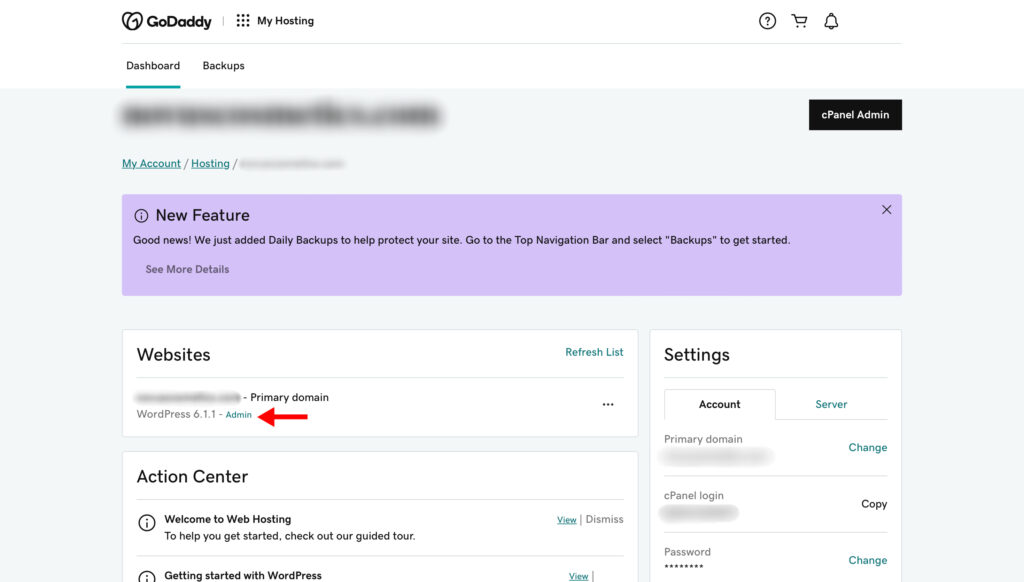
9. Under your domain name, click on the blue 'Admin' link next to WordPress to visit your new website.
How To Install WordPress Manually From cPanel
Manually installing WordPress can be a technical process, but it also gives you more freedom to tweak settings and customize certain elements of the website.
Here are the steps to manually install WordPress via cPanel using GoDaddy:

1. Log in to your GoDaddy account and go to the 'My Products' dashboard.
2. Scroll down to the 'Web Hosting' section and click on the 'Manage' button.
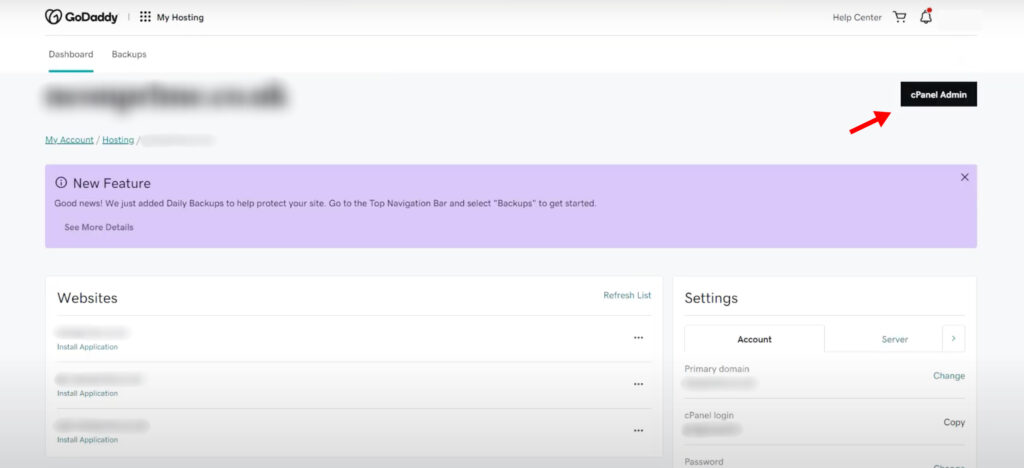
3. Click on the 'cPanel Admin' button in the top right corner.
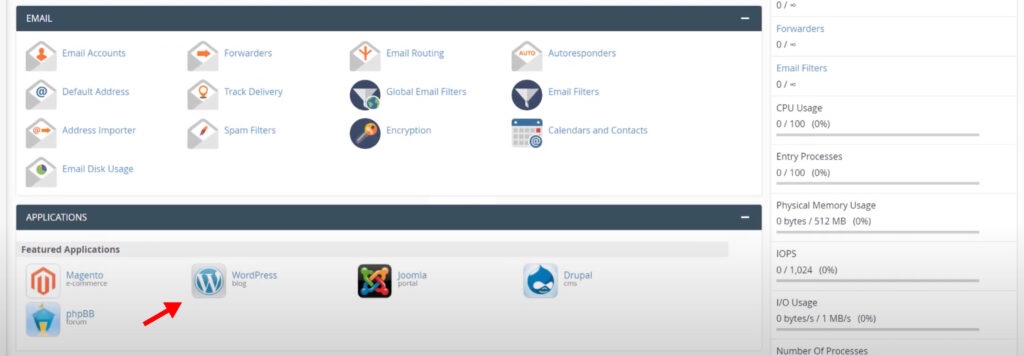
4. Once you're in the cPanel dashboard, scroll down to the 'Applications' section and click on the 'WordPress' icon.
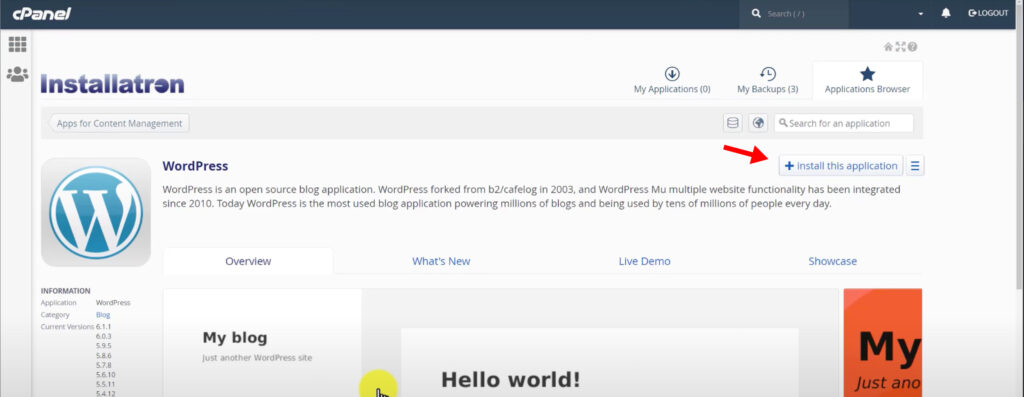
5. To begin installing WordPress, hit the '+Install this application' button.
6. Here, you'll be allowed to configure your website's settings. Let's take a look at the important ones:
- Domain: Select the domain where you want to install WordPress (choose https if you have an SSL certificate).
- Directory: Allows you to install WordPress on a specific subdomain (keep it blank if you want to install it on the main domain).
- Administrator Username/Password: Create a new username and password for logging into your WordPress dashboard.
- Administrator Email: Used for WordPress account recovery if you forget your password.
- Website Title/Tagline: Enter your website's name and tagline (which can be edited later).
- Limit Login Attempts: Only select 'Yes' if you remember your password.
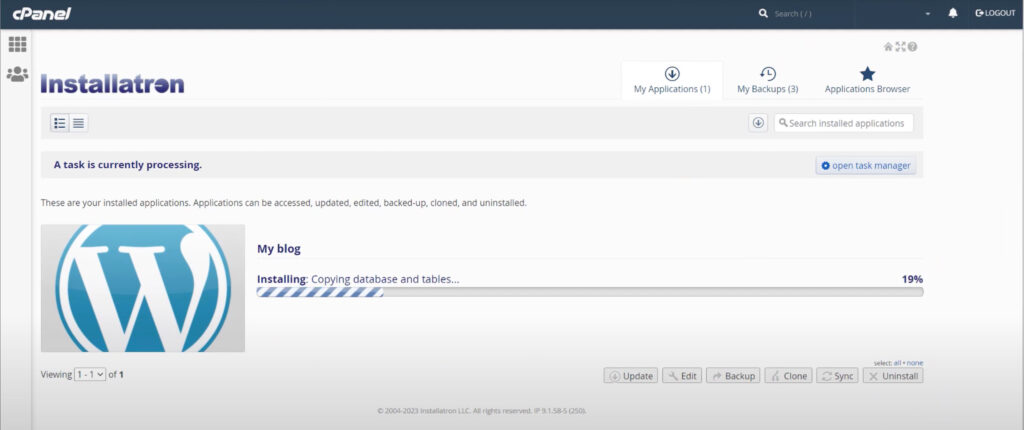
7. After you have configured your website, hit the 'Install' button at the end of the page.
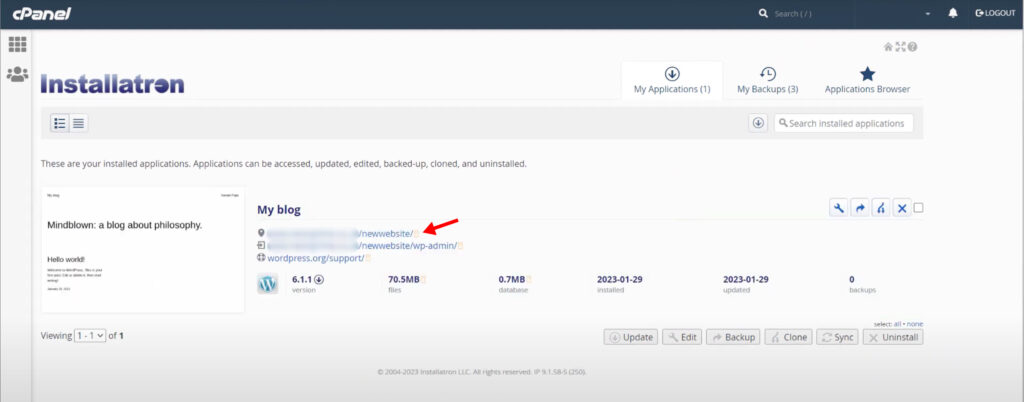
8. Once the progress bar is full, you can visit your newly installed WordPress website by clicking on the first link under 'My Blog'.
3 Things To Set Up For Your WordPress Website
Setting up WordPress on your website is just half of the story. In order to provide your users with a visually appealing and secure platform, you must check a few more things off your list. Here's a detailed list of things to update on your website:
1. Selecting A Theme
In order to attract incoming visitors and convert them into customers, you need to have a beautiful, eye-catching website.
This is where you need to decide what theme to use. While there are thousands of options in the market, the best WordPress themes offer:
- Great loading speeds
- Lots of customization options
- A user-friendly drag-and-drop builder
- Support for future updates
Next, you must decide what kind of niche you're opting for. You can simply install a multi-purpose theme or choose one that's specifically built for your use case such as e-commerce, online publications, portfolios, or agencies.
To make the process easy for you, here's a short review of our top theme picks for GoDaddy WordPress websites.
Astra
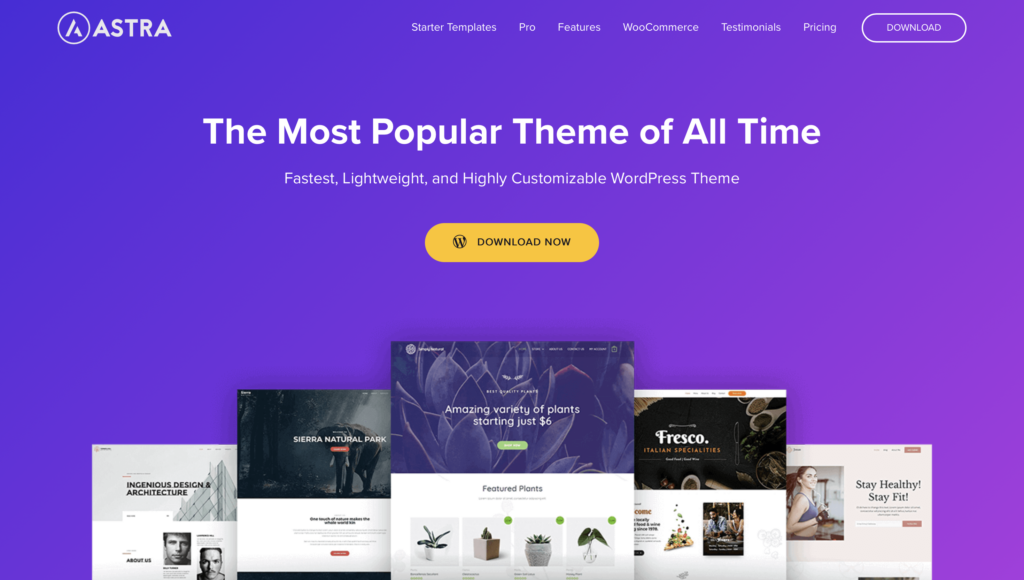
Astra is probably the most popular theme in the world for two reasons; super-fast loading speeds and being absolutely free.
However, that doesn't mean the theme lacks in any way. It's actually used by NASA, Stanford, and other big institutions.
The theme is also incredibly quick — it loads in just 0.5 seconds on a freshly-installed WordPress website! You can also fully edit the header/footer and customize elements that other free themes reserve for paying customers.
Astra also seamlessly integrates with WooCommerce, Elementor, Yoast SEO, and just about any plugin you can name.
If you want to know more about this theme, read our complete WP Astra in-depth guide.
GeneratePress
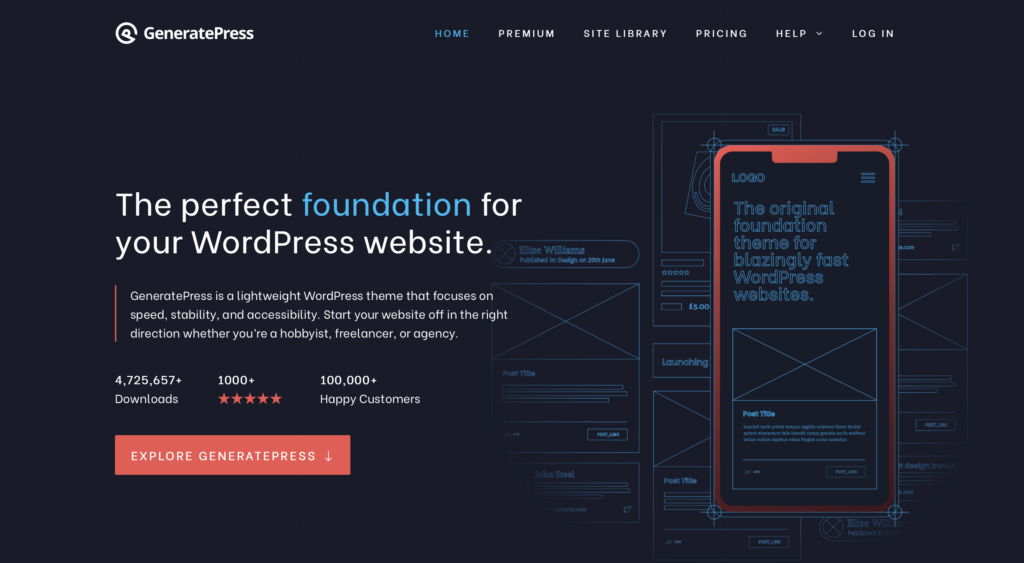
GeneratePress is an extremely reliable and fast all-in-one theme for niche site builders and blog owners.
It's used by over 500,000 websites and occupies less than 30kb of space on a new WordPress website, no matter what web hosting company you're using.
You can get both free and paid versions of GeneratePress, but the premium plan offers more customization options and a year of support and updates.
One of the best features of GeneratePress is that it's purely optimized for speed, so it will continue to load up within seconds after uploading content and installing tons of plugins.
For more details about the theme, read our full guide on why GeneratePress is rated as the fastest WordPress theme.
2. Installing Plugins
Managing a WordPress website can be a hectic task. Luckily, plugins can take care of a lot of extra work, like managing your site's security, speed, content, and customer data.
Here's a list of some essential WordPress plugins that every website should install.
WooCommerce
WooCommerce converts your website from a simple blog into a full-blown e-commerce store within minutes.
It contains everything you need to build a successful retail website — storefronts, inventory/tax calculators, product pages, payment gateways, checkout forms, and much more.
Although WooCommerce itself is completely free, you can purchase extensions to add extra functions like social media marketing, shipment tracking, and language/currency conversion.
Read our detailed guide on WooCommerce here.
Elementor
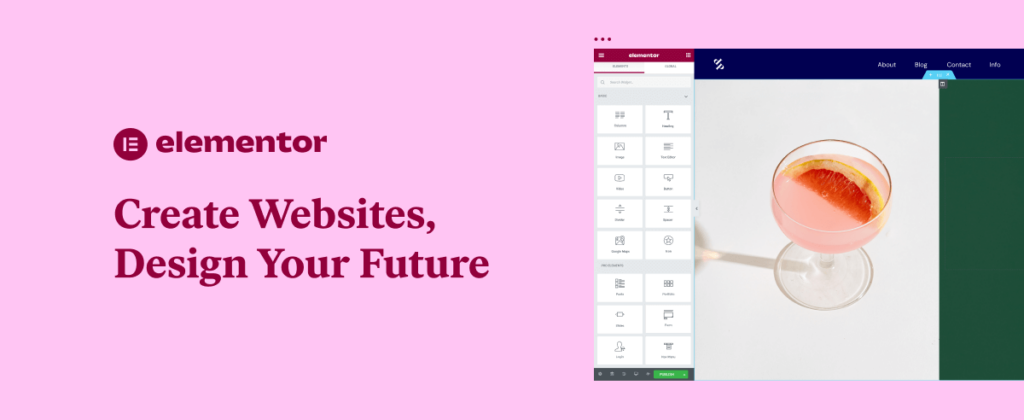
Elementor is one of WordPress's most popular drag-and-drop builders, allowing you to conveniently design stunning websites within hours.
One of the best features of Elementor is its lightweight framework that helps your website load up within seconds, no matter how many elements you add to it.
If you want to learn more about its features and capabilities, read our full review on Elementor.
OptinMonster
OptinMonster is a highly useful lead generation tool that has worked wonders for WordPress websites trying to convert their web traffic into customers.
Unlike traditional form builders, OptinMonster allows you to create stunning pop-ups and opt-in forms with their intuitive drag-and-drop builder. You can also A/B test different variations and get a detailed analytic summary of your campaigns.
For your ease of mind, OptinMonster also comes with a 14-day money-back guarantee if you don't receive the results you expected.
To know more about OptinMonster, check out our full OptiMonster review of the plugin.
Rank Math
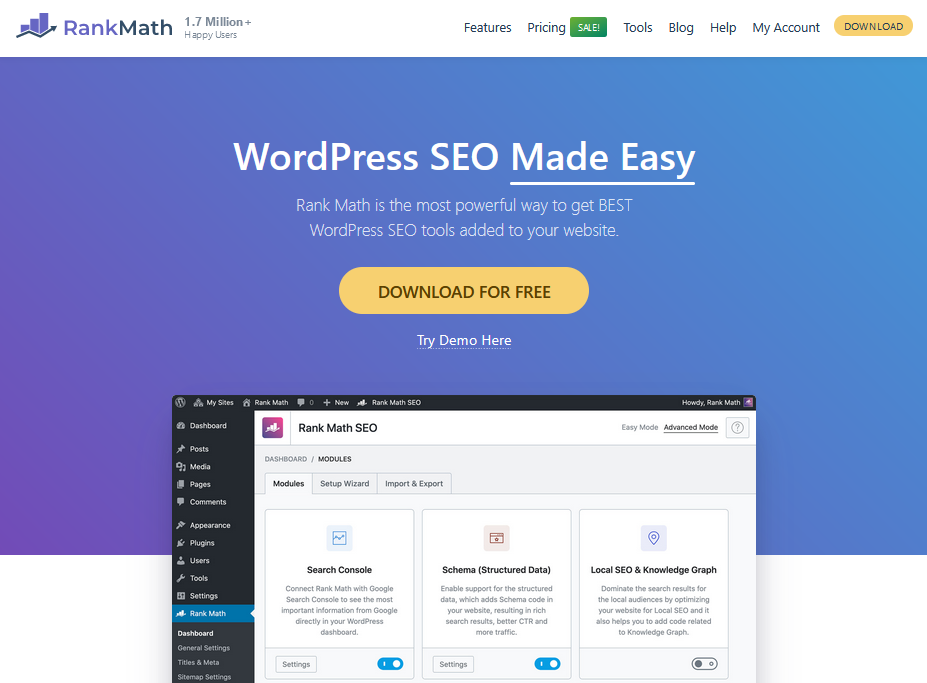
On-page optimization plays a huge role in a niche website's revenues and overall growth.
That's why we recommend installing Rank Math to improve your search engine optimization and skyrocket your rankings.
Yoast gives you a comprehensive analysis of your site's keyword optimization, internal linking, content quality, and other metrics that are crucial for algorithms to understand and rank your site higher on SERP.
It also allows you to attract organic traffic with social media pages and maintain your site's health by redirecting errors.
To discover more benefits of this plugin, check out our complete guide in our Rank Math review.
JetPack
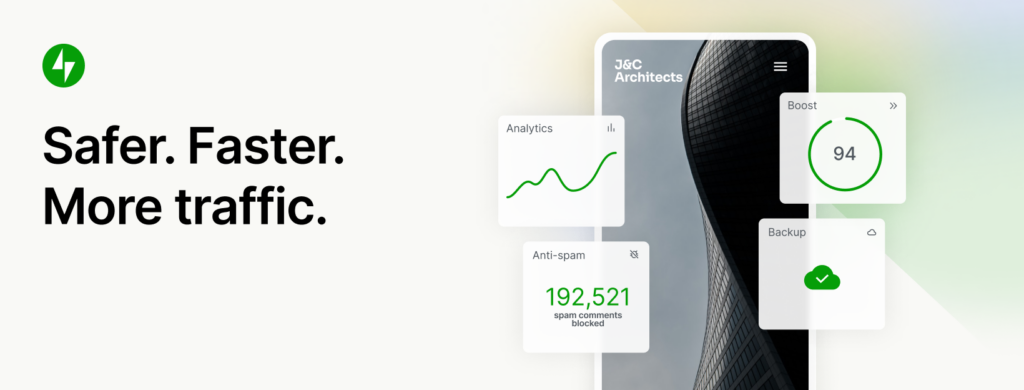
JetPack is an all-in-one plugin for WordPress that can boost your site's growth and search engine rankings with a single click.
Trusted by over 5 million websites worldwide, JetPack takes care of multiple everyday tasks such as:
- Malware scanning
- Spam protection
- Automatic social media sharing
- Image compression
JetPack also has a smartphone app that makes it easier to check on your engagement and site statistics, publish content, and receive updates when you're away from your laptop.
Additionally, the plugin comes with a free built-in Content Delivery Network to improve your loading speeds.
3. Setting Up SSL
Securing your WordPress website with SSL is crucial for two reasons; gaining customer trust and ranking higher on Google.
The little SSL 'padlock' beside the URL makes visitors feel secure when sharing sensitive data, such as passwords, credit card details, and home addresses. It will also boost your Google rankings as the search engine rewards websites that offer data protection to their visitors.
GoDaddy includes one year of SSL protection with the purchase of every hosting package over 12 months. You can also purchase their all-in-one Website Security plan for a discounted price or hand over your SSL duties to their team with their Managed SSL Services.
Conclusion
Learning how to use WordPress with GoDaddy hosting is a skill that can help you build your dream website or even charge other people to create one for them.
If you want to generate revenue from your website, check out our step-by-step tutorial on How To Start A Blog That Makes Money Using WordPress.
Or, if you want to explore other web hosting services, check out our full comparison between BlueHost and GoDaddy.
Want to learn step-by-step how I built my Niche Site Empire up to a full-time income?
Yes! I Love to Learn
Learn How I Built My Niche Site Empire to a Full-time Income
- How to Pick the Right Keywords at the START, and avoid the losers
- How to Scale and Outsource 90% of the Work, Allowing Your Empire to GROW Without You
- How to Build a Site That Gets REAL TRAFFIC FROM GOOGLE (every. single. day.)
- Subscribe to the Niche Pursuits Newsletter delivered with value 3X per week
My top recommendations


